
DIY Tufted Headboard Using Pool Noodles: Budget-Friendly & Renter-Safe
My boyfriend, Devon, and I moved in together almost two years ago. Wow—how time flies. Between his stuff and mine, neither of us had a headboard. For a while, we used an old college tapestry I had, tacked up on the wall above our bed as a makeshift “headboard.” You know, for the feng shui. But after staring at that tapestry for long enough, I decided: I’m not in college anymore. It was time for a real headboard. First-world problems, I know.
As an avid DIY’er, I never shy away from a challenge. I took a look around our home and gathered some materials: two large pieces of cardboard (about 5 feet by 1.5 feet), black quilted velvet fabric from a previous project, and a few salvaged pallets that Devon brought home from work. After a little brainstorming, I realized I could buy some pool noodles, hot glue them to the cardboard, cover them with the fabric, attach a couple of 2x4s as legs—and voilà! A brand-new DIY headboard. Fun and functional.

I got started right away. I bought six pool noodles from Dollar Tree, planning to cut them in half and glue them vertically to the cardboard for that tufted, upholstered look. Devon kindly volunteered to help. He cut a few before I gently let him know they needed to be even. Some ended up a little wonky—but I like to call that character.


It took me about 45 minutes to hot glue the noodles to the cardboard. After that, I needed a break, so I let the glue dry while I grabbed a snack. Then it was time for the “upholstery.” (I say that in quotes because I failed sewing in home ec—so no sewing involved here.) Luckily, I had my trusty hot glue gun! I laid the fabric down and, to my delight, it fit perfectly. I glued each dip between the noodles and tucked the fabric into the grooves to create that plush, tufted look. After about 30 minutes, the fabric was on, and it looked so good. You could barely tell the pool noodles weren’t perfect.

(Please excuse the dust and pet hair. I had to do this on the floor. But as a 3 cat house we have plenty of Lint rollers lying around so I cleaned it right off.)
Now came the tricky part: tucking the extra fabric behind the cardboard in a way that looked clean. While I don’t mind a little DIY “character,” I still wanted the final product to feel polished—our bedroom is our sacred space for peace and comfort, after all. Devon and I put our heads together, and he had the genius idea to staple the fabric to the back. Perfect for the upholstered vibe we were going for. So we gently folded the fabric and stapled it down, keeping things neat and secure.
And just like that—we had a headboard!


The final step was attaching the 2x4s. I measured the height of our bed frame and marked the wood where I wanted it to connect to the headboard. Then I used my trusty glue gun again (hot glue is a lifestyle, honestly) to attach the board to the legs. Because the headboard is lightweight, it stands on its own without needing to be mounted to the wall—which is ideal since we rent and avoid making holes whenever we can.
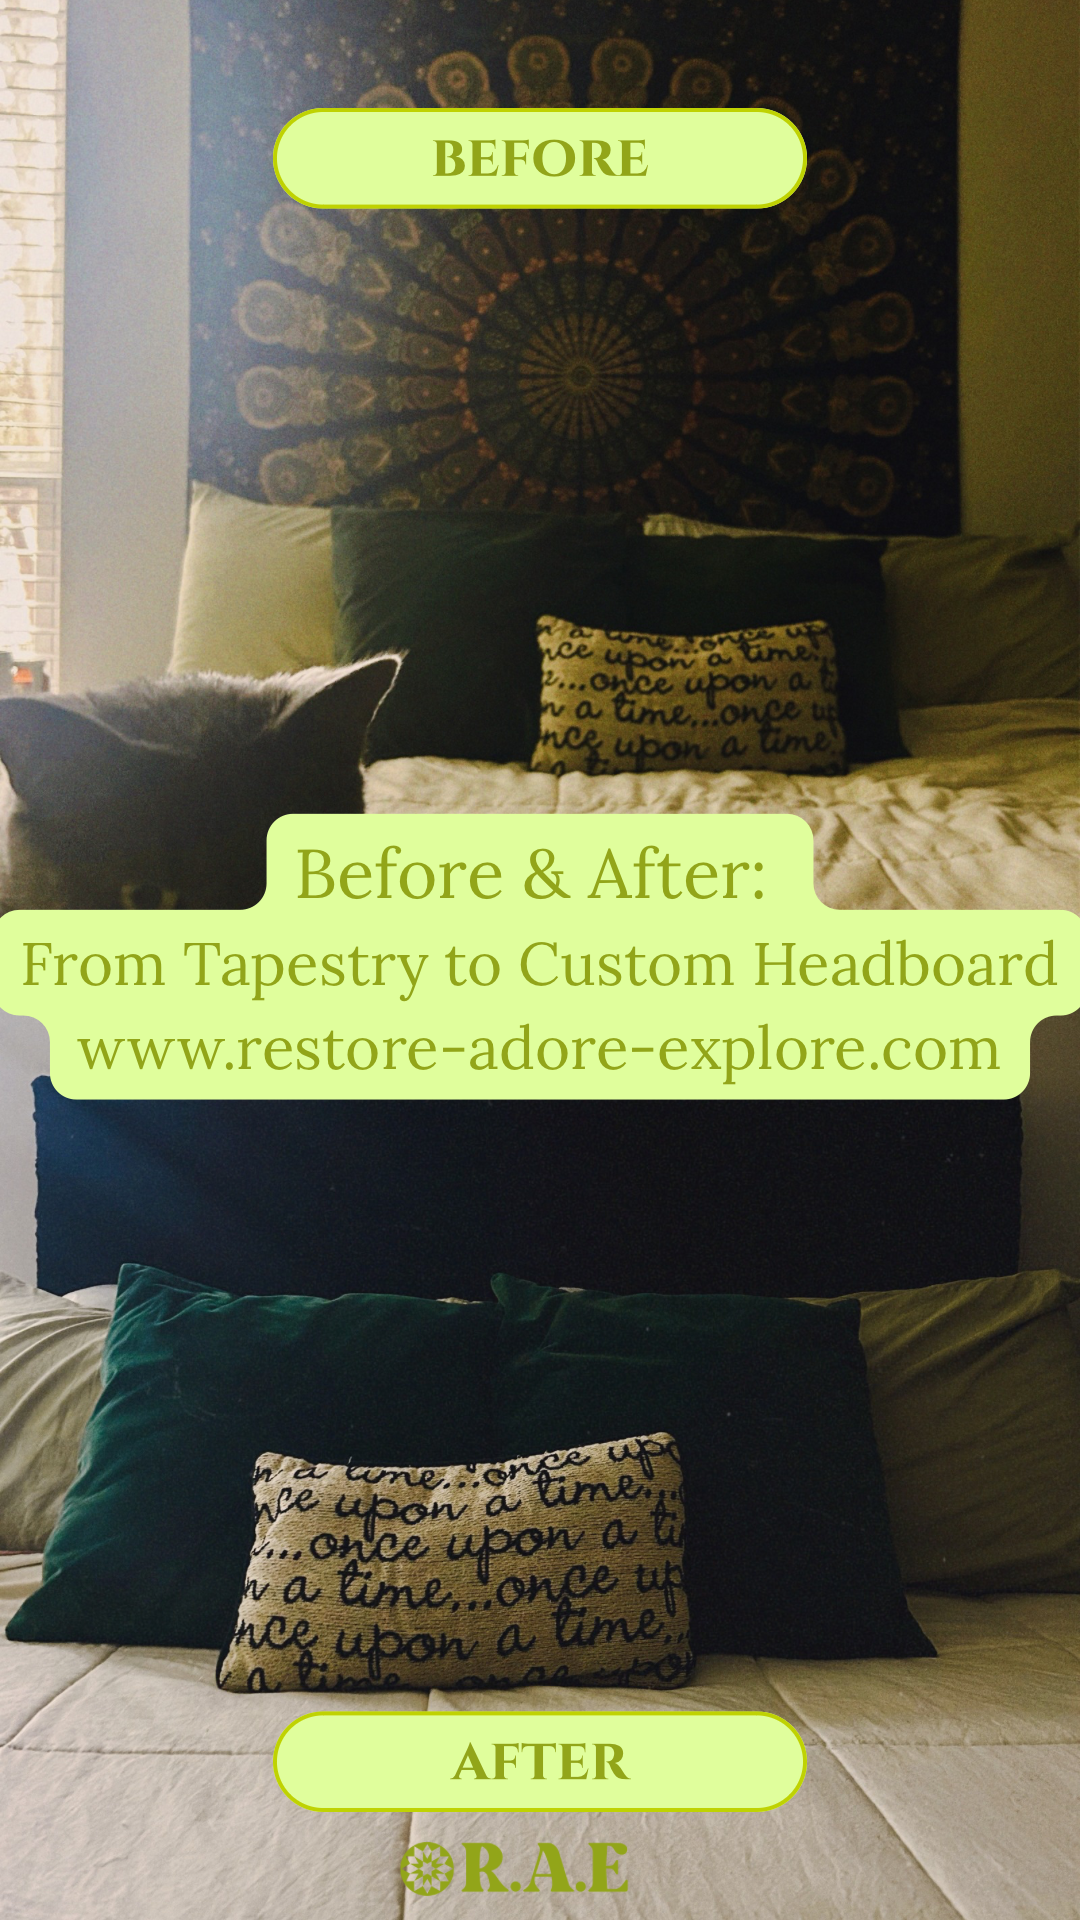
BEFORE:

AFTER:

I’m so happy with how it turned out. It gives the room a more elevated, cozy feel, and best of all—it’s totally custom. Stay tuned for our next DIY project: adding a shelf above the headboard!